How to Make Links of Interstellar Proxy with GitHub Codespaces
If you’re looking for a way to access blocked sites at school or work, Interstellar Proxy is one of the most popular tools used by students worldwide. It’s a web proxy that lets you bypass restrictions easily — but did you know you can create your very own Interstellar Proxy link using GitHub Codespaces? In this guide, you’ll learn how to set up and share your own Interstellar Proxy link that lasts up to 4 hours.
Let’s walk through the process step-by-step.
What You’ll Need
Before you start, make sure you have:
A GitHub account (free)
Access to GitHub Codespaces
Basic familiarity with opening a terminal in the browser
Step 0: Create a GitHub Account
If you don’t already have one, go to github.com and sign up.
Complete the sign-up process by verifying your email.
Important: GitHub Codespaces is free for public repos, so you won’t need to pay for this setup.
Step 1: Extend Your Codespace Time Limit
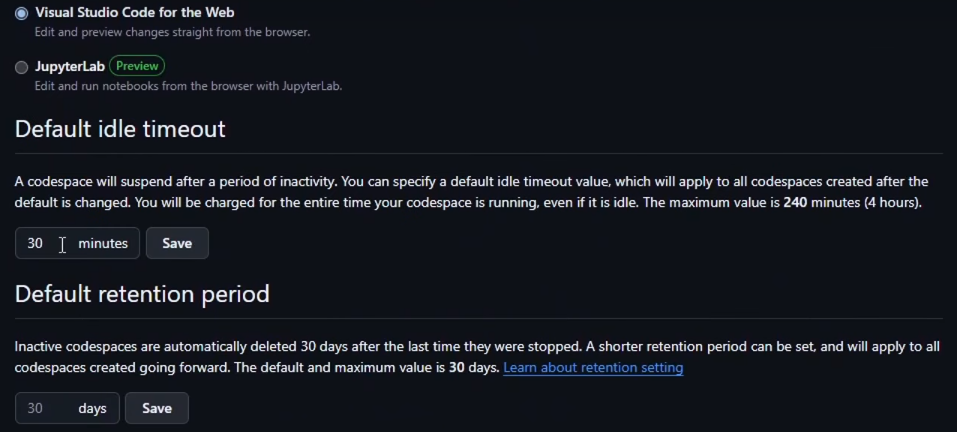
By default, GitHub Codespaces shut down after 30 minutes of inactivity. Let’s extend this to the maximum time allowed (4 hours).
Go to your GitHub Settings.
Scroll down to the Codespaces section.
Find the Default idle timeout setting.
Set it to the maximum: 240 minutes (4 hours).
This ensures your Interstellar Proxy link stays alive longer.
Step 2: Set Up the Interstellar GitHub Codespace
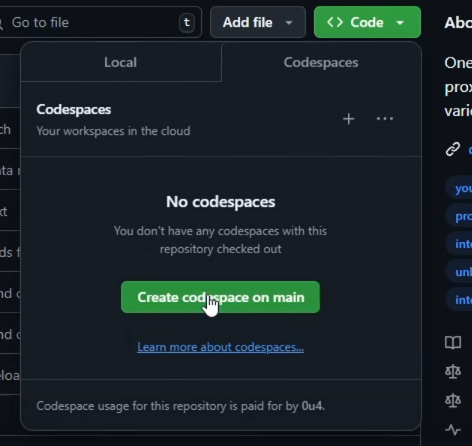
Go to the official Interstellar Proxy GitHub repository.
(You can use this link if it’s still public.)Click the green Code button.
Select Codespaces from the dropdown.
Click Create codespace on main.
Wait a few seconds while GitHub sets up your own cloud development environment.
Step 3: Run the Interstellar Application
Once your codespace loads, follow these instructions:
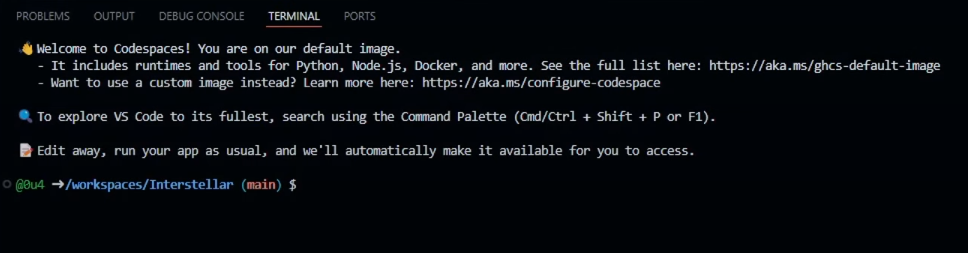
If you’re not already inside the Terminal, click Terminal → New Terminal from the top menu.
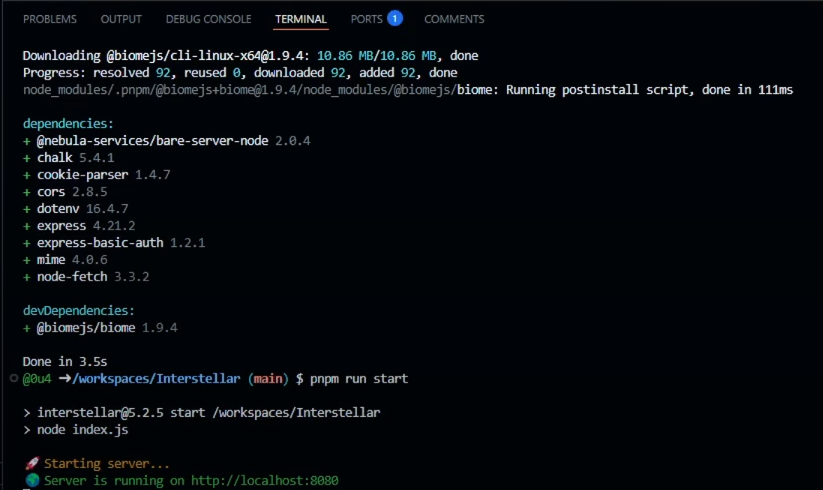
Run the following commands:
pnpm install
(This installs the necessary dependencies.)
Then:
pnpm run startAfter a short moment, you’ll see a message like:
Your application running on port 8080 is available.Click the Make Public button next to the port message. This allows anyone with the link to access your proxy.
Step 4: Share or Save Your Proxy Link
At the bottom of the Codespace, find the PORTS tab.
Click on the link under the Forwarded Address column.
This is your personal Interstellar Proxy link!
Copy the link and share it with friends (or bookmark it for yourself).
💡 Tip: The link will stay active for up to 4 hours as long as your codespace remains open and active.
Bonus: Customize Your Proxy Page (Optional)
If you’re familiar with HTML/CSS, you can customize the Interstellar interface inside the Codespace:
Look for the
public/folderEdit the
index.htmlfile to change logos, styles, or text
Don’t forget to restart the server if you make changes.
Final Thoughts
Using GitHub Codespaces to host your own Interstellar Proxy is an easy and powerful way to create temporary access to restricted websites. It’s perfect for students who need a quick setup without buying a domain or server.
Just remember:
It’s temporary (4 hours max)
Use it responsibly
Avoid sharing in public places where school admins might find it
FAQs
Q: Does this method work on school Chromebooks?
Yes! As long as you can access GitHub and Codespaces, it should work directly in the browser.
Q: Do I need to install anything?
Nope. Everything runs in the cloud — just your browser is enough.
Q: Can I use other proxies like Rammerhead this way?
Yes! Many proxy repositories work with this method. Just search for their GitHub pages and repeat similar steps.
If this guide helped you, feel free to share it with others who need unblocked access or want to learn how to make their own proxy links. Stay smart and browse safe!


Well written and easy to understand. Keep it up!
I appreciate the detailed explanation, it helped a lot.
b0tjfz
Interesting perspective—thanks for making me think.
This is so helpful. Looking forward to your next post!